Tasks & Checklists
Tasks are how work gets done in ReleaseLoop. Whether it is booking mastering, submitting to your distributor, pitching Spotify editorial playlists, or chasing a contract back from a manager — it all lives in tasks.
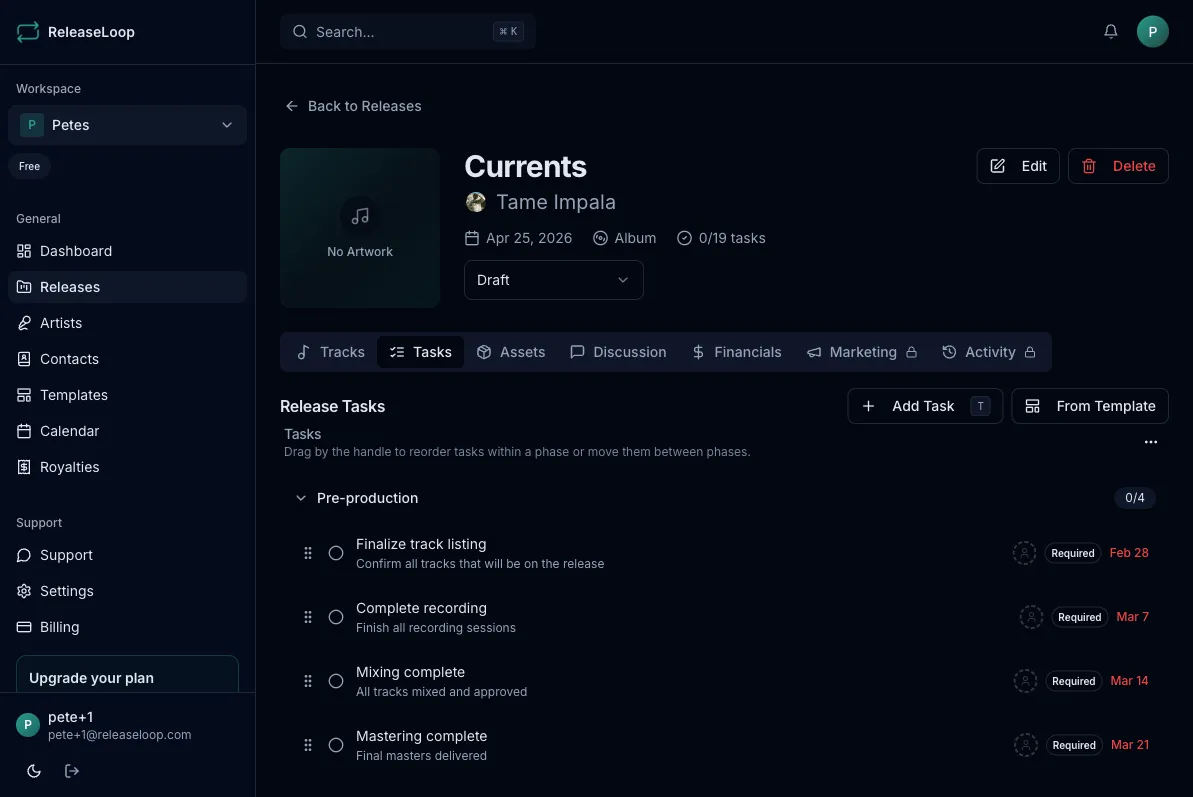
A task can be linked to a release, an artist, a contact, or nothing at all. Release checklists still live on the release’s Tasks tab, but you are no longer limited to release work: create a standalone to-do for artist-management admin, or a follow-up tied to a contact, and see everything together on the Tasks page.
The Tasks page
Section titled “The Tasks page”The Tasks page in the sidebar shows every task in your workspace, in two views:
- List — tasks grouped by due date, so today’s deadlines float to the top
- Board — a kanban board for dragging tasks through statuses
Narrow things down with the filter bar: Artist, Release, Contact, Assignee, and Status filters, plus a My tasks toggle that shows only work assigned to you. The Subtasks toggle expands or collapses every checklist at once.
Clicking a task anywhere in the app opens it in the task editor, where you can update it, re-link it to a different release, artist, or contact, or delete it.
Task contexts
Section titled “Task contexts”When creating a task you choose what it is attached to:
- Release — classic release checklist work. These tasks also appear on the release’s Tasks tab.
- Artist — roster work that is not tied to one release: renegotiate a contract, update an EPK, book a photoshoot. These appear on the artist’s Tasks tab too.
- Contact — follow-ups tied to a person or company: chase a playlist curator, reply to a booking inquiry.
- None — a general workspace to-do.
You can re-link a task between contexts at any time from the task editor.
Tasks with a due date also appear on the Calendar, alongside release dates and marketing activities.
Creating tasks
Section titled “Creating tasks”From a release:
- Open a release and go to the Tasks tab
- Click Add Task or press T as a keyboard shortcut
Or from the Tasks page, where the create dialog lets you pick the context (release, artist, contact, or none).
Fill in:
- Title — what needs to happen (e.g., “Submit final masters to DistroKid,” “Send press release to blog contacts,” “Schedule Instagram teaser 2 weeks before drop day”)
- Assignee — which team member is responsible (optional). On a label, you might assign distributor delivery to your ops person, playlist pitching to your marketing lead, and artwork approval to the artist’s manager.
- Due date — when it should be completed (optional). Work backwards from your release date — most distributors need assets 3-4 weeks before street date, and Spotify editorial pitching opens 4 weeks out.
- Priority — the importance level
Working with tasks
Section titled “Working with tasks”- Mark complete — check off tasks as they are done
- Reorder — drag and drop tasks to change their priority order
- Assign — tasks are color-coded by assignee for easy scanning across a busy release
- Bulk actions — mark all tasks complete or delete all at once
Subtasks (checklists on a task)
Section titled “Subtasks (checklists on a task)”Big tasks usually hide several smaller steps. A task like “Record music video” might involve finding a location, doing a trial run, picking outfits, and storyboarding. Instead of cluttering your task list, add those steps as a checklist on the task itself:
- Open a task (click it in any task list)
- In the Checklist section, type an item and press Enter — or paste a multi-line list to add several items at once
- Tick items off as you go; drag to reorder, click an item’s text to rename it
Tasks with a checklist show a progress chip (e.g. 2/5) in every task list. Click the chip to expand the checklist inline and tick items without opening the task. On the Tasks page, the Subtasks toggle in the filter bar expands or collapses every checklist at once.
If a checklist item grows into something bigger, hover it and use Convert to task — it becomes a standalone task linked to the same release, artist, or contact. Duplicating a task also copies its checklist (with all items reset to unticked).
Importing from templates
Section titled “Importing from templates”If you have release templates set up, you can import a full task checklist into any release in seconds:
- Go to the Tasks tab
- Click Import from Template
- Select a template
- All template tasks will be added to the release
This is a huge time saver when you follow a consistent release process. Set up a template once with your standard steps — mastering, distributor delivery, metadata review, playlist pitching, social rollout, press outreach — and apply it to every new release.
Task notifications
Section titled “Task notifications”When notifications are enabled, team members receive alerts for:
- Being assigned to a task
- Tasks due within 24 hours
- Overdue tasks
Configure notification preferences in Settings > Notifications. This is especially useful when multiple people are involved in a campaign and you need to make sure deadlines for distributor submissions or marketing milestones do not slip.
- Use templates to standardize your release workflow so every release gets the same level of attention
- Assign tasks to specific team members so nothing falls through the cracks — especially critical steps like submitting metadata or clearing samples
- The dashboard shows urgent tasks across all releases in one place, so you can see at a glance what needs attention today across your entire roster
- Use artist tasks for roster admin that has no release attached — contract renewals, EPK refreshes, photoshoot bookings — so it stops living in your head or a separate notes app